
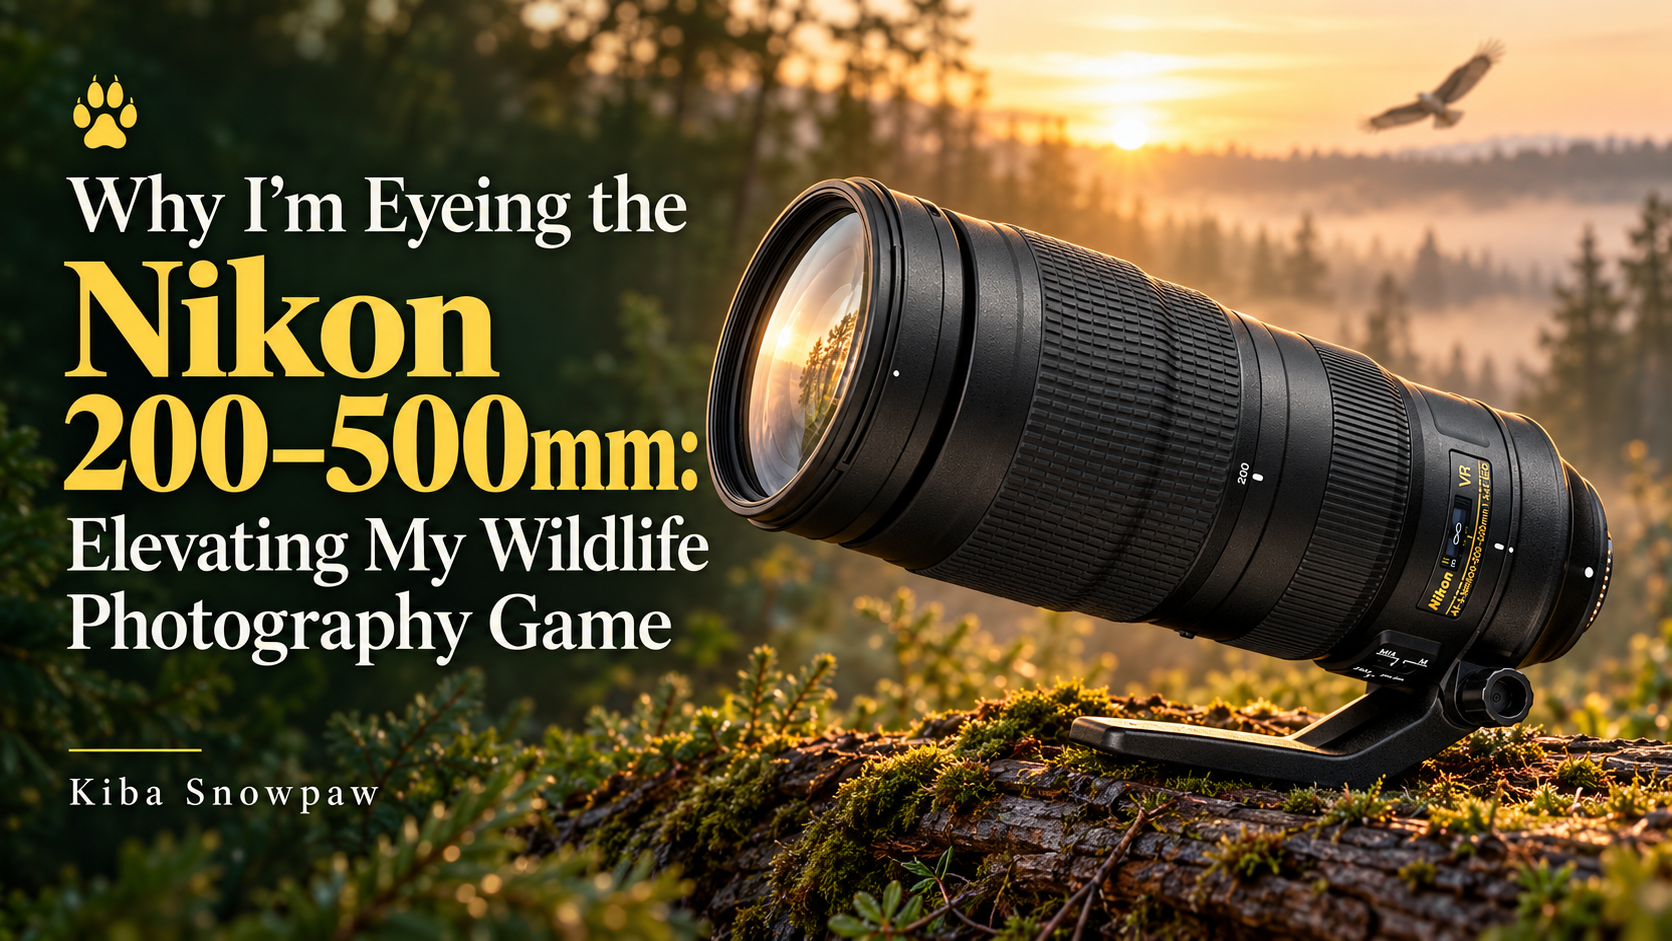
Update: I now own the Nikon 200–500mm. I’ve kept this article as the story of why I wanted it before buying it.
Anyone who’s spent time photographing wildlife, especially in zoos or at bird-rich locations like Selsø Sø, knows the frustration: You spot the perfect animal, the shot you’ve been dreaming of, and… you’re cut off by a fence, a moat, or, worse, a sea of open space you just can’t cross. No matter how hard you try, your lens just doesn’t get you close enough. You’re left cropping pixels or wishing you could get just a few meters nearer. That’s where I’m at. And it’s why I keep coming back to the Nikon AF-S 200–500mm f/5.6E ED VR.


Why This Lens?
I’ve been shooting wildlife and zoo animals for years, mostly using my trusted Nikon D7500 (DX) paired with the legendary Nikon 70–200mm f/2.8 VR and occasionally some older manual or budget telephoto lenses. Don’t get me wrong, the 70–200mm is brilliant for portraits and many zoo situations, and the sharpness at f/2.8 in good light is something special. But when I’m shooting smaller birds or anything that keeps its distance, especially at places like Selsø Sø, 200mm just isn’t enough. Even the tighter framing of DX and the 1.3× crop mode only gets me so far.


The Challenge of Fences and Distance
Let’s talk real-world limitations. Zoos and bird sanctuaries have to put animal welfare first, which is as it should be. But that can also mean more distance, more barriers, and fewer opportunities for those tight, frame-filling animal shots, especially with smaller, skittish species. My D7500’s 1.5× crop factor gives a tighter view than an FX body, but I’m still not filling the frame unless the animal comes much closer. Which, let’s be honest, never happens when you need it.
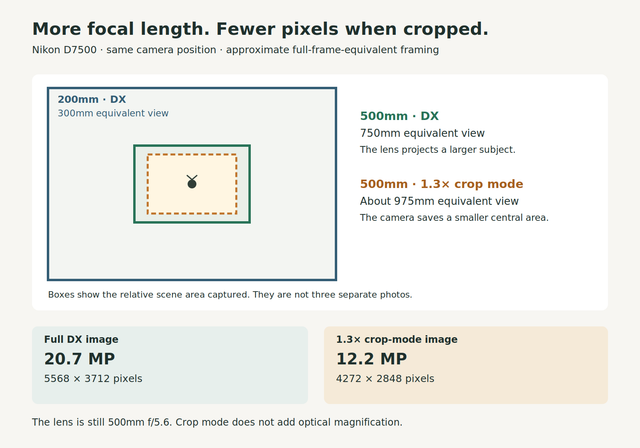
That’s where a 500mm lens starts looking less like a luxury and more like a useful tool. At 500mm on DX, you get roughly the same field of view as 750mm on full frame. With the 1.3× crop mode, the framing is about 975mm equivalent. Compared with 200mm from the same position, 500mm makes a distant subject about 2.5 times larger across the image. That is a real change in what I can photograph from the other side of a safety barrier.
There’s one detail worth getting straight: crop mode doesn’t add optical magnification. The lens is still 500mm. The camera simply saves a smaller part of the image, reducing the D7500’s large-file dimensions from 5568 × 3712 pixels, about 20.7 megapixels, to 4272 × 2848 pixels, about 12.2 megapixels. Shooting in full DX and cropping later gives me more freedom to decide the composition afterwards.


A longer lens won’t make every fence disappear. A wide aperture, a permitted position reasonably close to the mesh, and an animal well behind it can help blur the fence. Sometimes a small change of angle is enough to find a clearer gap. If autofocus keeps grabbing the wire, manual focus can help. Through glass, I’d watch reflections and shade the lens where possible. None of that requires crossing a barrier or trying to make an animal come closer.
Why the Nikon 200–500mm f/5.6E ED VR?
This lens has a near-legendary status for anyone serious about nature and wildlife photography, but not looking to sell their car for a super-tele prime. Here’s what matters to me:
- Constant f/5.6 aperture: The maximum aperture stays the same throughout the zoom range. It isn’t as bright as my f/2.8 lens, but it is a workable compromise for outdoor wildlife.
- VR (Vibration Reduction): Nikon rates it for up to 4.5 stops of camera-shake reduction under its test conditions. That helps with handheld shots and a steadier viewfinder, but it won’t freeze a moving bird.
- Sharpness: It offers the detail I’m looking for at long focal lengths. Accurate focus, enough shutter speed, and good conditions still matter, even with a good lens.
- Versatility: 200–500mm gives me room to adjust the framing as an animal moves. At the short end on DX, the view is still fairly tight, so the 70–200mm remains useful for closer animals.
- Focuses down to 2.2m: That distance is measured from the camera’s sensor plane. It isn’t a macro lens, but it can be useful for smaller subjects that aren’t too close.
- Build and weight: Solid, but definitely not light. It weighs about 2.3kg with the tripod collar, or 2.09kg without it, before adding the camera. That’s something I’d notice after a full day at the zoo.
A Few Things I’d Need to Remember in the Field
The biggest trade-off is light. f/5.6 is two stops slower than f/2.8. In the same light, that means roughly four times the ISO to keep the same shutter speed, or a shutter speed four times slower at the same ISO. VR can help me hold the camera steady, but a bird moving its head still needs a suitable shutter speed. I’d keep the 70–200mm for dimmer enclosures and situations where I don’t need all that reach.
- For moving wildlife: AF-C is a sensible starting point. A single focus point can work well for a still animal’s eye; dynamic-area or group-area AF is worth trying for a moving bird.
- For birds in flight: Around 1/2000s is a useful starting point, then adjust for wing speed, light, and the effect I want. Manual exposure with Auto ISO can help keep the chosen shutter speed and aperture while the light changes.
- Use the focus limiter: The 6m–∞ setting can speed up focusing when everything I’m photographing is at least six meters away. Switch back to FULL when the subject is closer.
- Choose the VR mode for the subject: NORMAL suits stationary subjects; SPORT is intended for fast, unpredictable movement and can be useful when panning.
- Support the lens: A monopod can make a long session easier where it’s allowed. For a tripod, use the lens collar rather than the camera’s tripod socket, and support the lens when carrying the setup.
More reach still won’t guarantee a good photograph. I’d want a clear view of the eye, a background that doesn’t fight the subject, and enough room in the frame for whatever the animal is doing. Sometimes a wider photograph that includes the surroundings tells the story better than the tightest possible crop.
The Reservation: Money and Priorities
Here’s the catch: It’s not cheap. Even at the discounted price I spotted before my upcoming vacation, it’s still a massive investment, one that would wipe out my “fun budget” for months. If I come home with money left, maybe I’ll take the plunge. If not, it’s back to saving, step by step.
I keep asking myself: Is it worth it? For me, as someone who shoots animals, birds, and the occasional zoo trip, the answer is “probably, yes.” But it’s a big step, and I’m not the type to jump on expensive gear unless it opens up photographs I can’t comfortably make with what I already have.
Before spending that much, trying a borrowed or rented copy would help me judge the weight, handling, and focusing on my own camera. If I buy used, I’d want to check autofocus, VR, the zoom action, and the glass, rather than deciding on price alone.
What Would Change for Me?
- Birds at Selsø Sø: A better chance of filling the frame instead of inspecting a tiny subject in Lightroom. No more feeling quite so jealous of birders with their monster primes.
- Zoo Photography: More options for composing around fencing, moats, and enclosure backgrounds, so the animal gets more attention in the photograph.
- Wildlife in Denmark: More opportunities for detailed wildlife images while keeping the distance the animals need.
At Selsø Sø, there are viewing opportunities near the church and a birdwatching tower at the southern end of the lake. A longer lens would be useful there, but choosing a good viewpoint and waiting for the birds to move into a better position would still be part of the work.


Final Thoughts: Leveling Up
If you’re a wildlife photographer on a DX Nikon body and you’re frustrated by “just not being able to get close enough,” the Nikon 200–500mm f/5.6E ED VR might be your next step. For me, it’s about giving myself the chance to take photos I’ve always wanted, but never quite managed with my current kit. It’s about respecting the distance animals need, but still capturing the magic.
So, will I buy it? If the stars, and my bank balance, align after my vacation, yes. If not, I’ll keep saving. But one thing’s for sure: the next time I see a rare bird or a shy lynx behind a fence, I want to be ready.
Stay tuned for updates, and hopefully some new close-up wildlife shots!
Sources and photo credits: Nikon’s lens specifications, 200–500mm manual, D7500 image sizes, D7500 autofocus guide, and zoo photography guide; U.S. Fish & Wildlife Service bird photography tips; and Danmarks Naturfredningsforening’s Selsø Sø guide. The added photographs are credited beneath each image.